How to change IP from Client Area (for multiple IPs)
FireVPS offers multiple IP addresses with their Windows RDP/VPS on demand. You can alternate between those IP addresses whenever you want. You can do it easily by yourself from your FireVPS client area/client panel.
For doing so, first you need to login to your FireVPS account. You can login to the account from here: Client Area
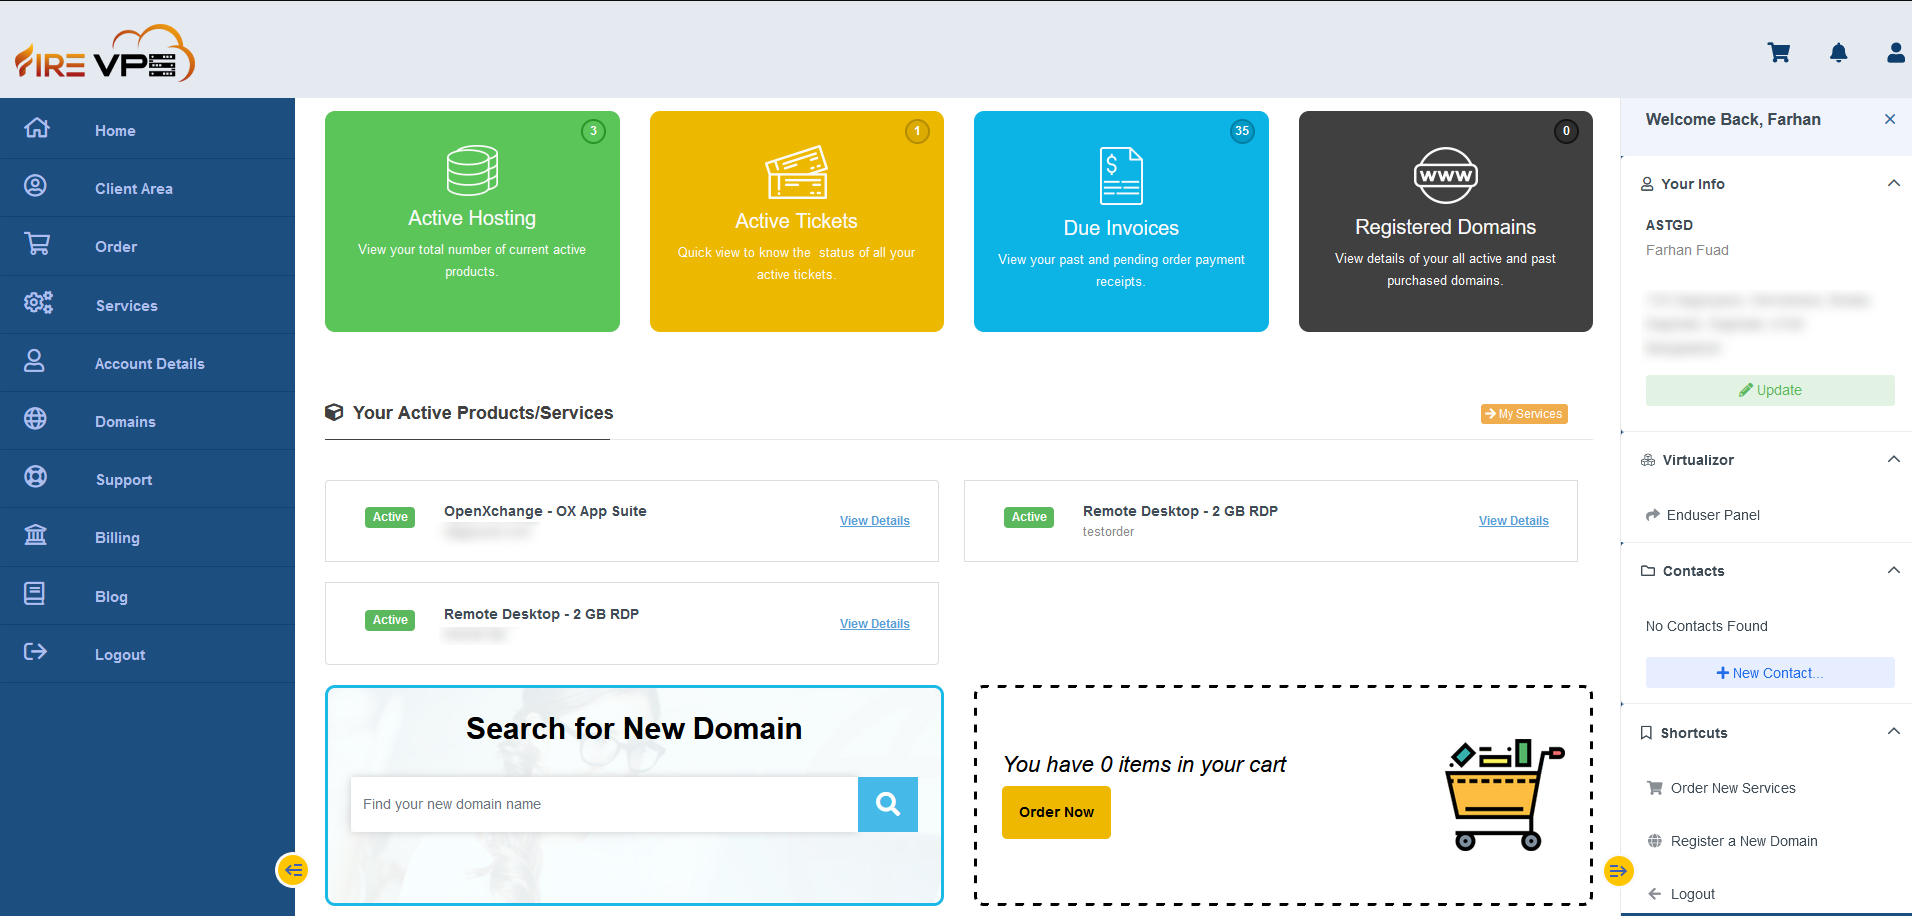
Go to the “Services” option from the “left side bar” and click “My Services”.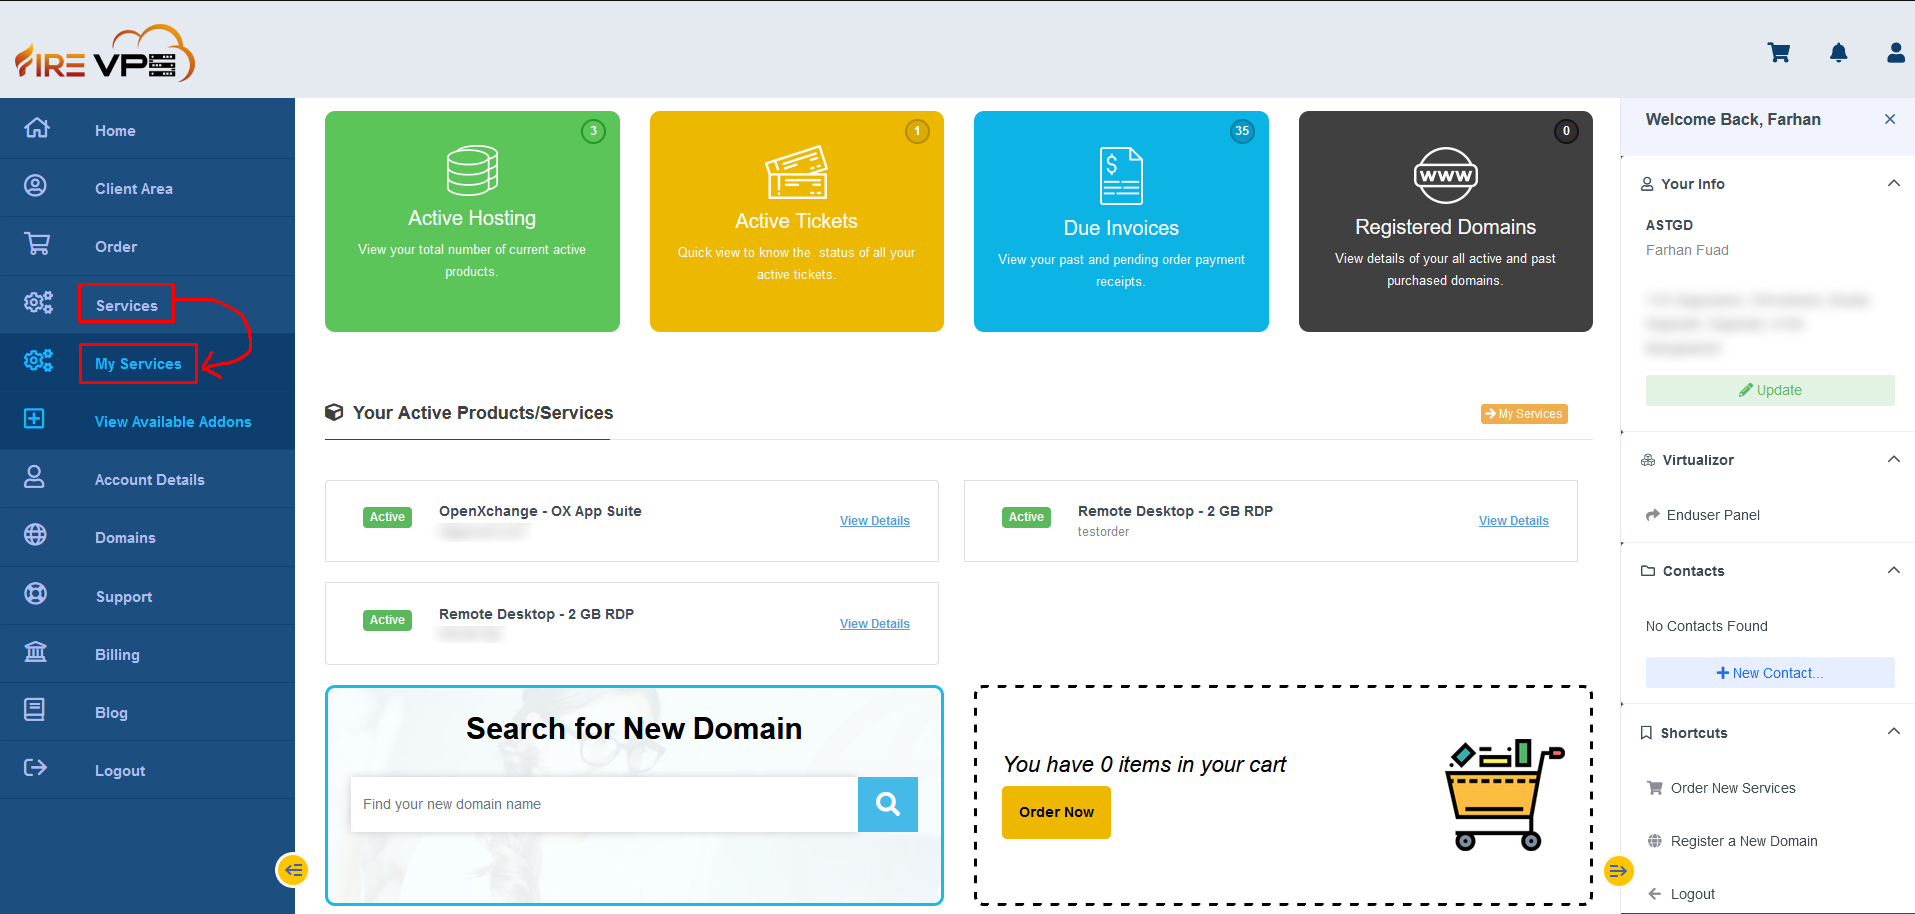
It will load all your services. Select the product or service for which you want to change the IP address.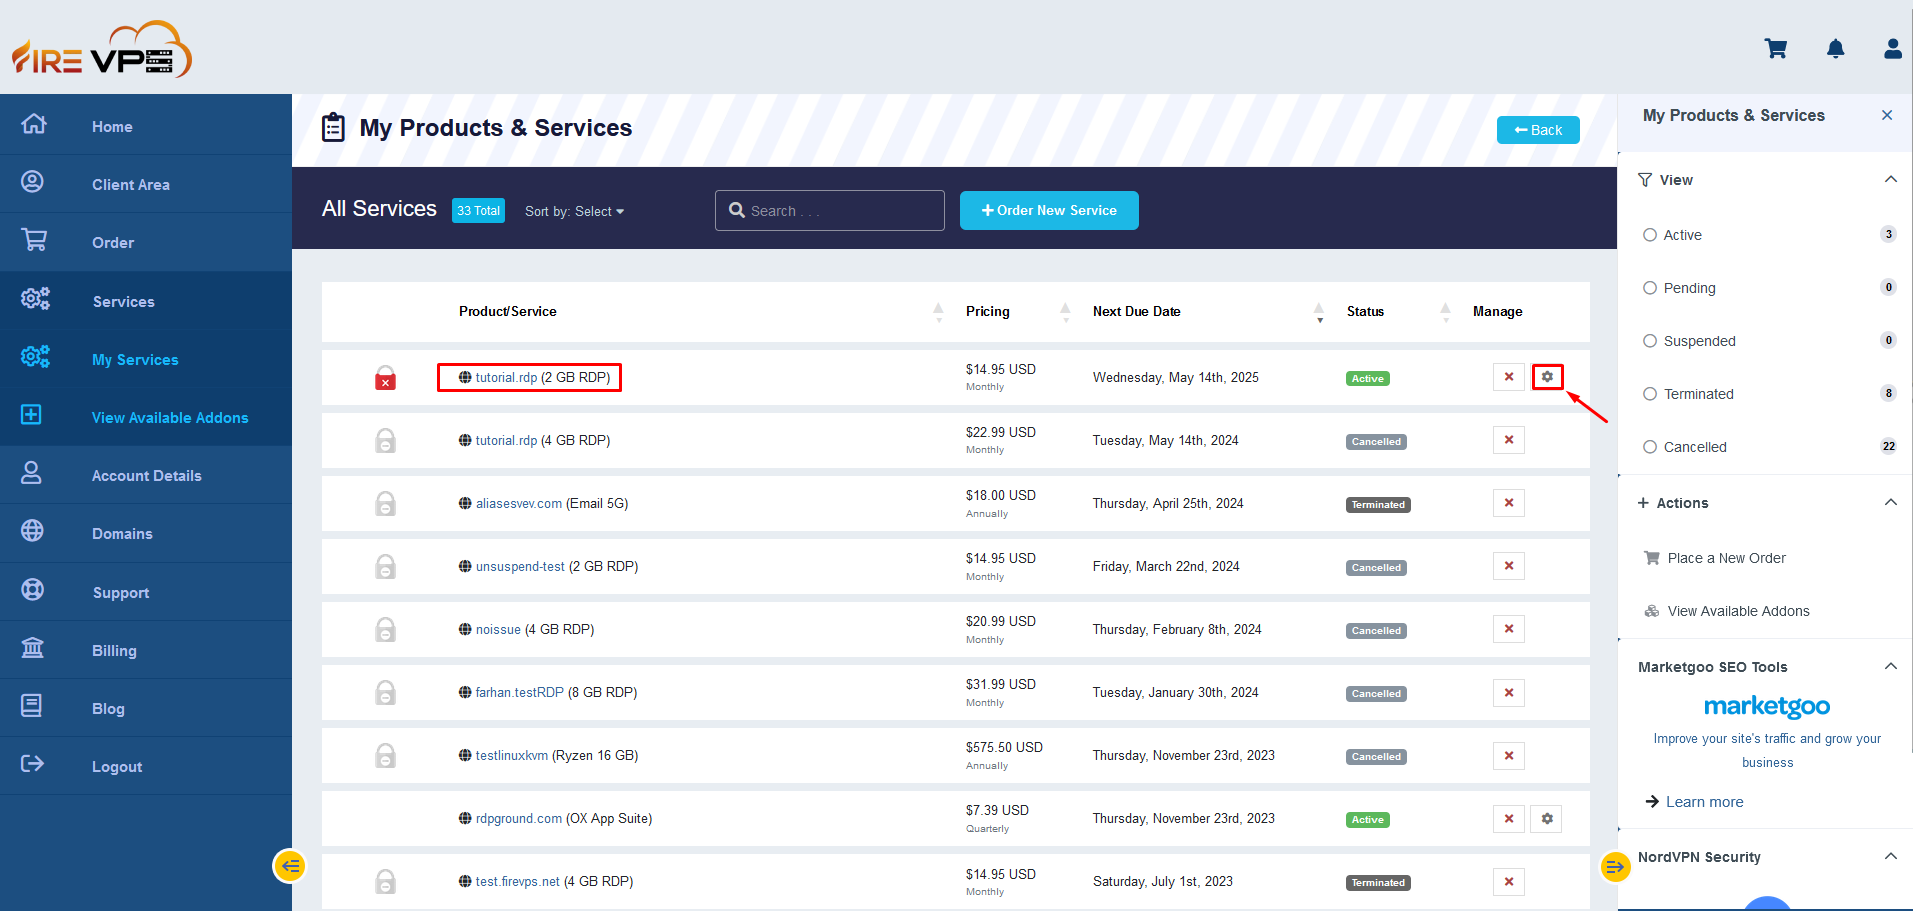
Once the selected service’s page is loaded, scroll down a little and you will see several options. Go to the “Settings” tab.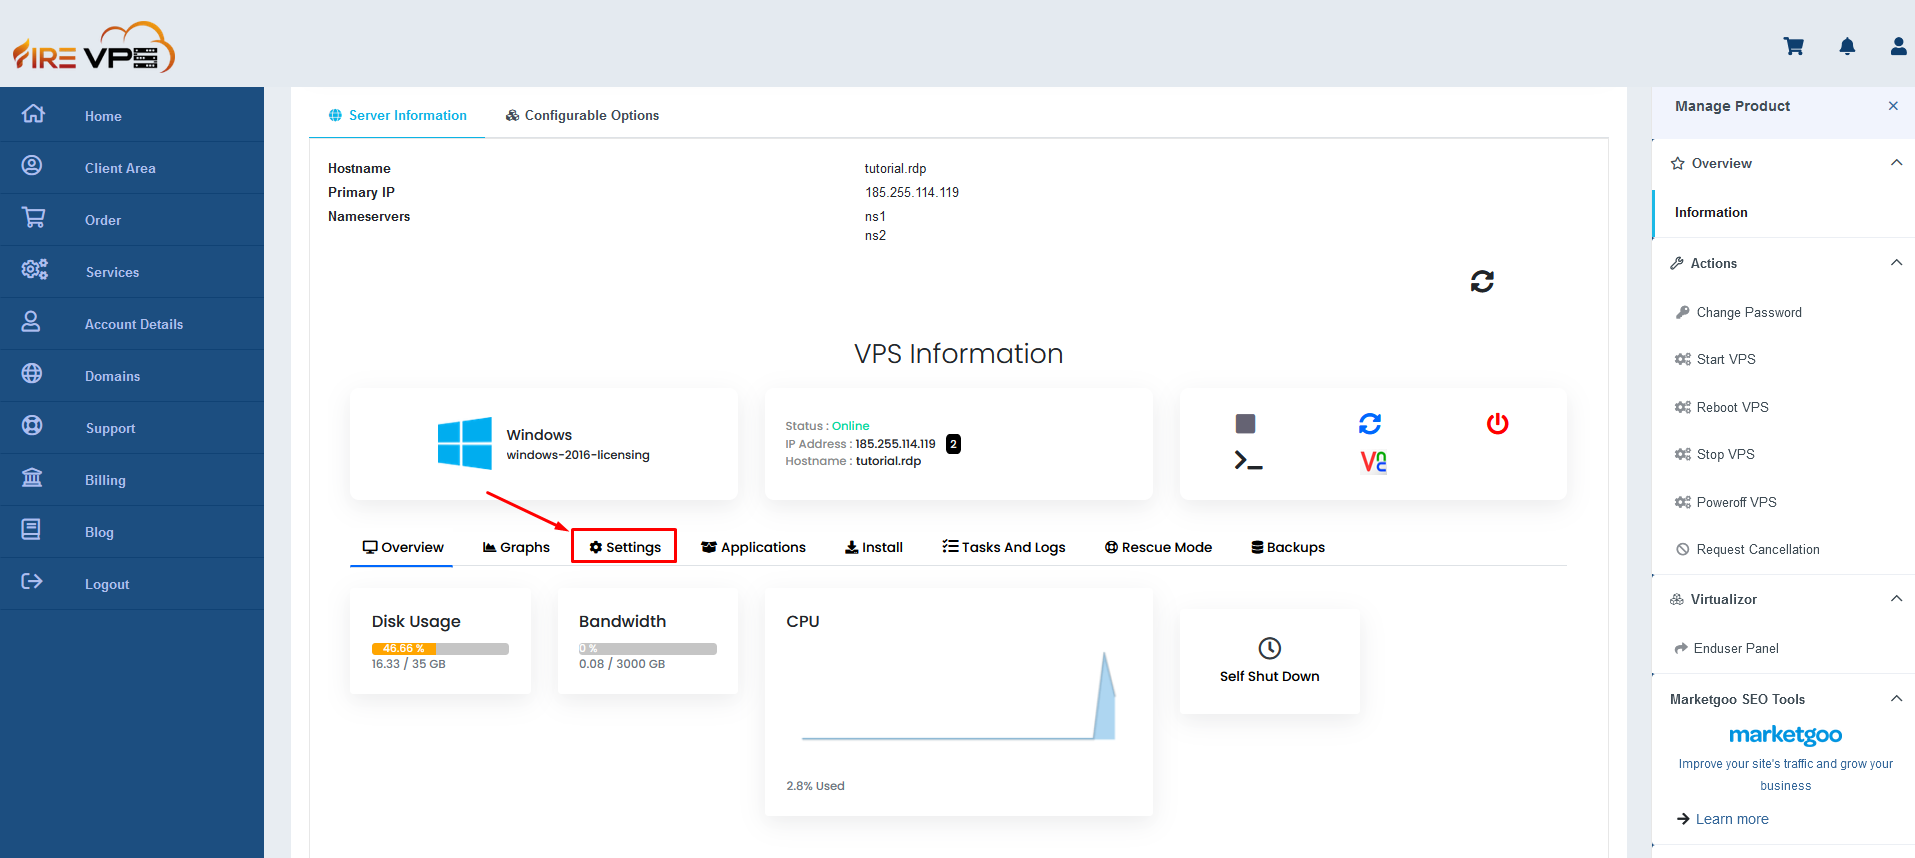
Now go to the IPs option. Click on the IP address and you will see the available IP addresses from the dropdown.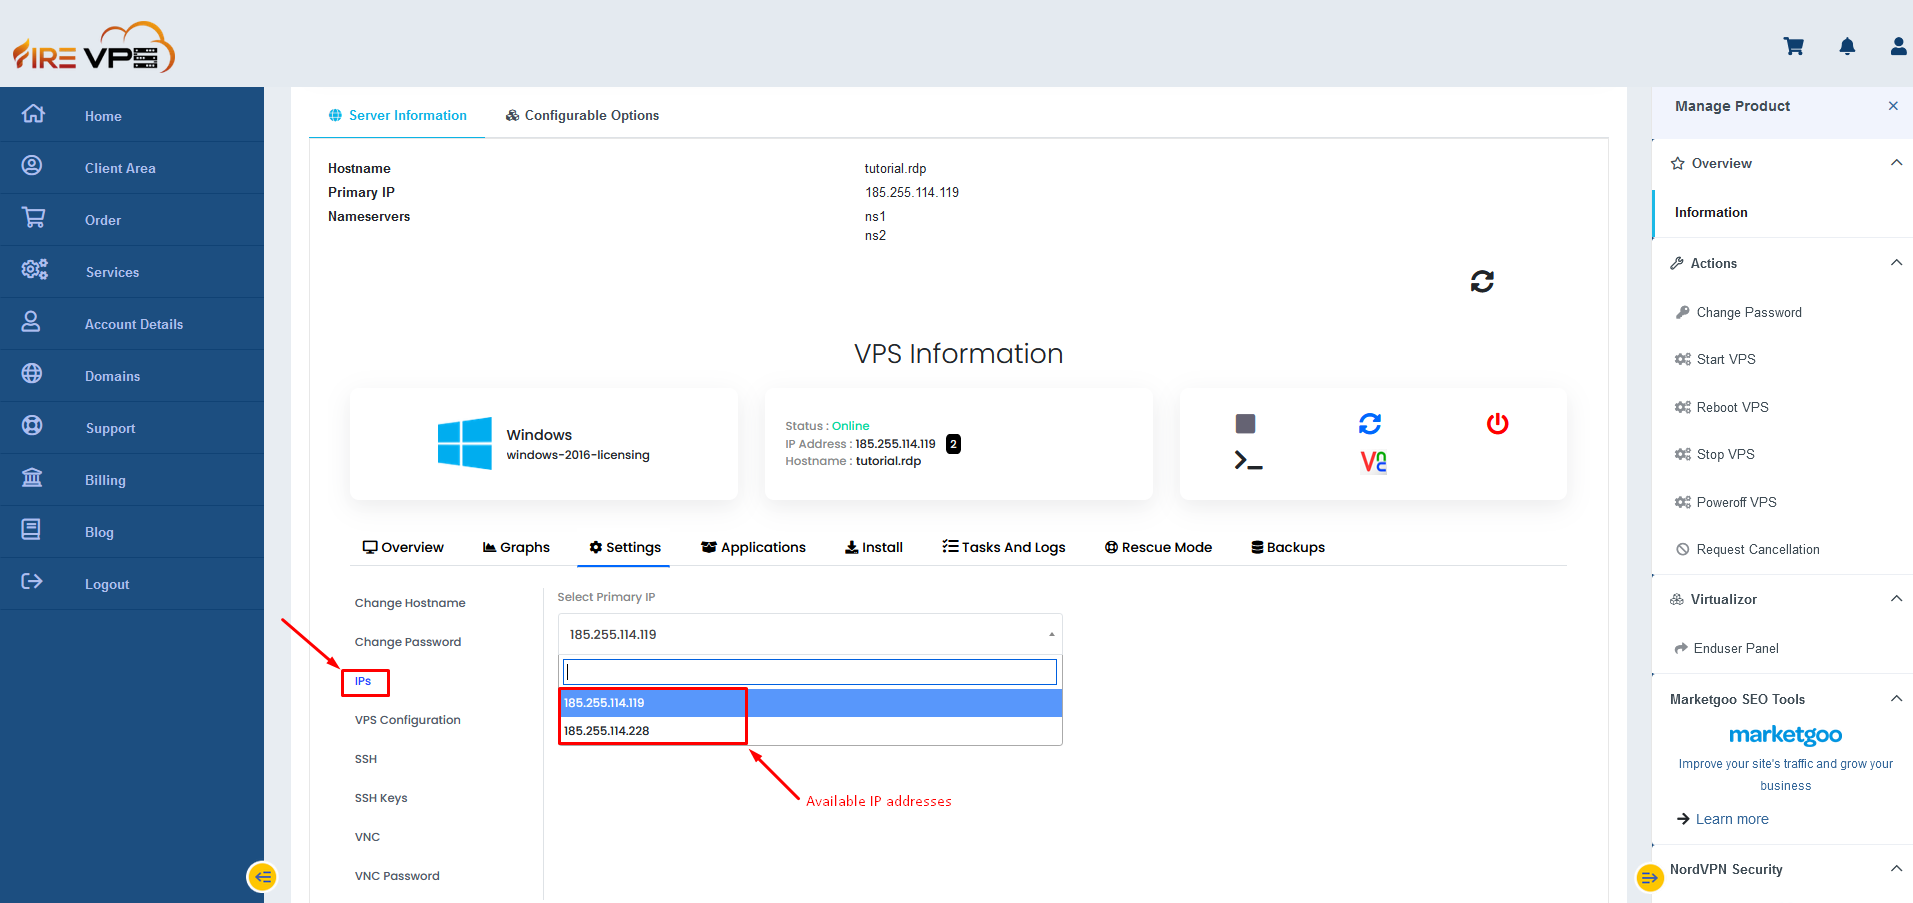
Now select the IP address that you want to set for the RDP/VPS and click “Set Primary IP”.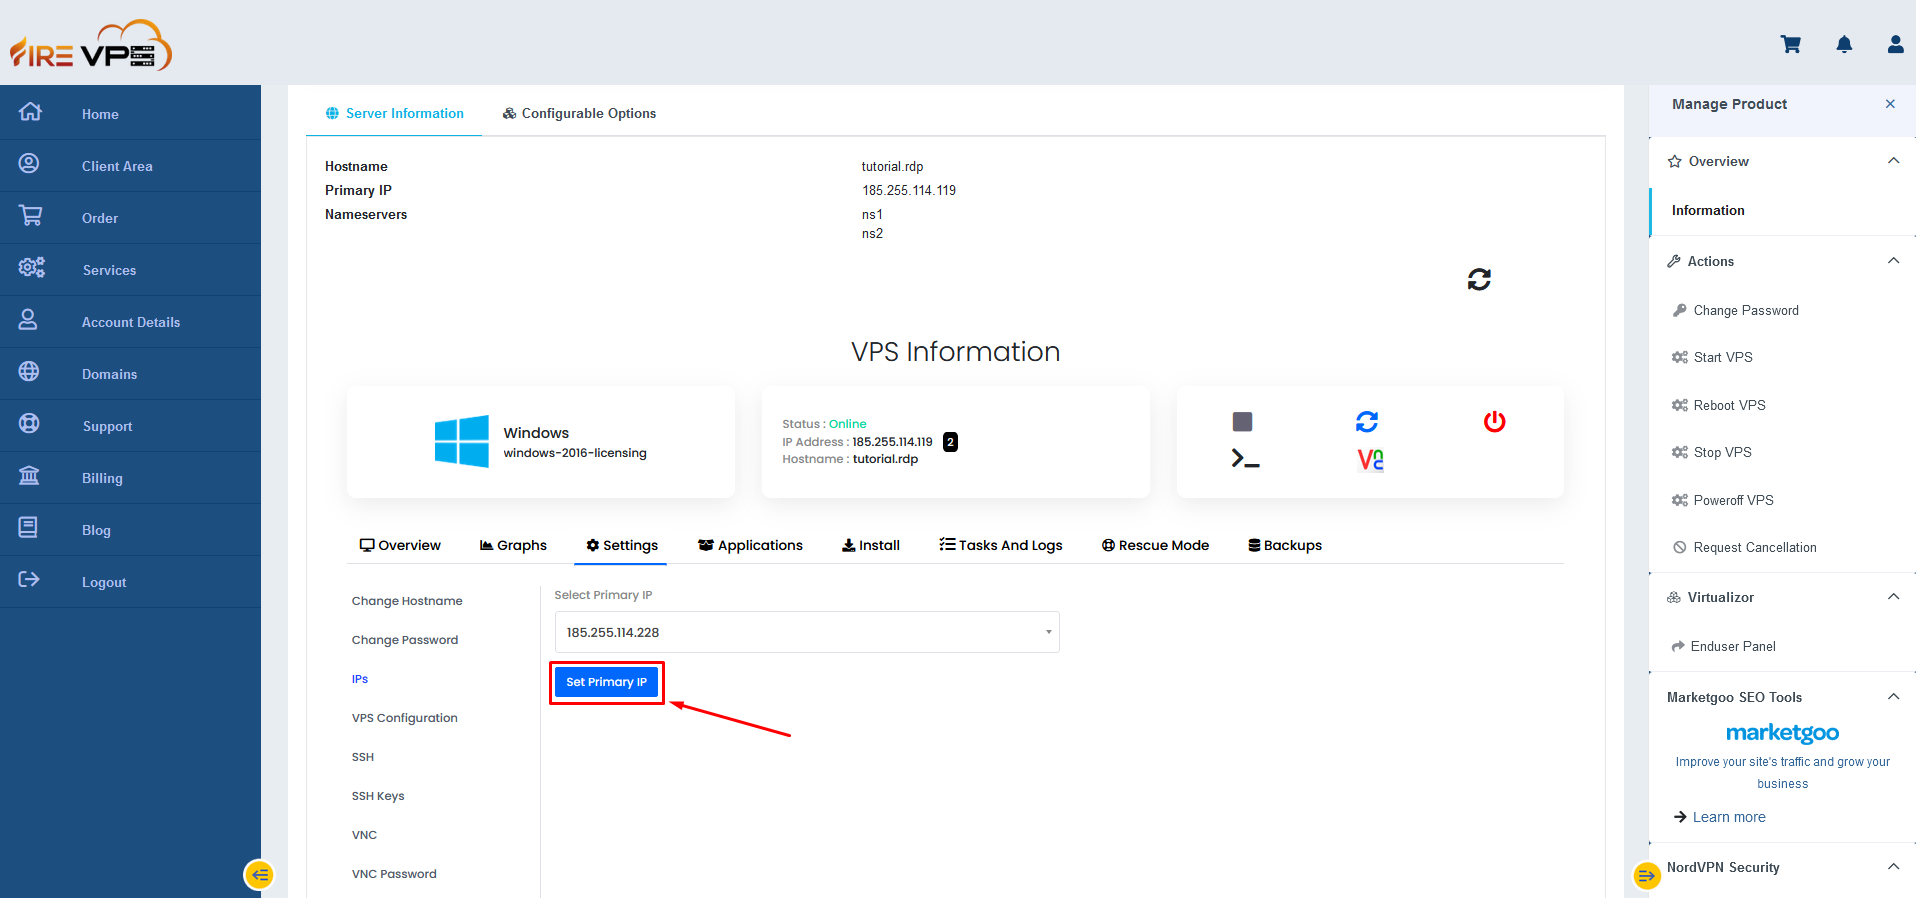
It will show loading for a while and once it is done, it will show a success message.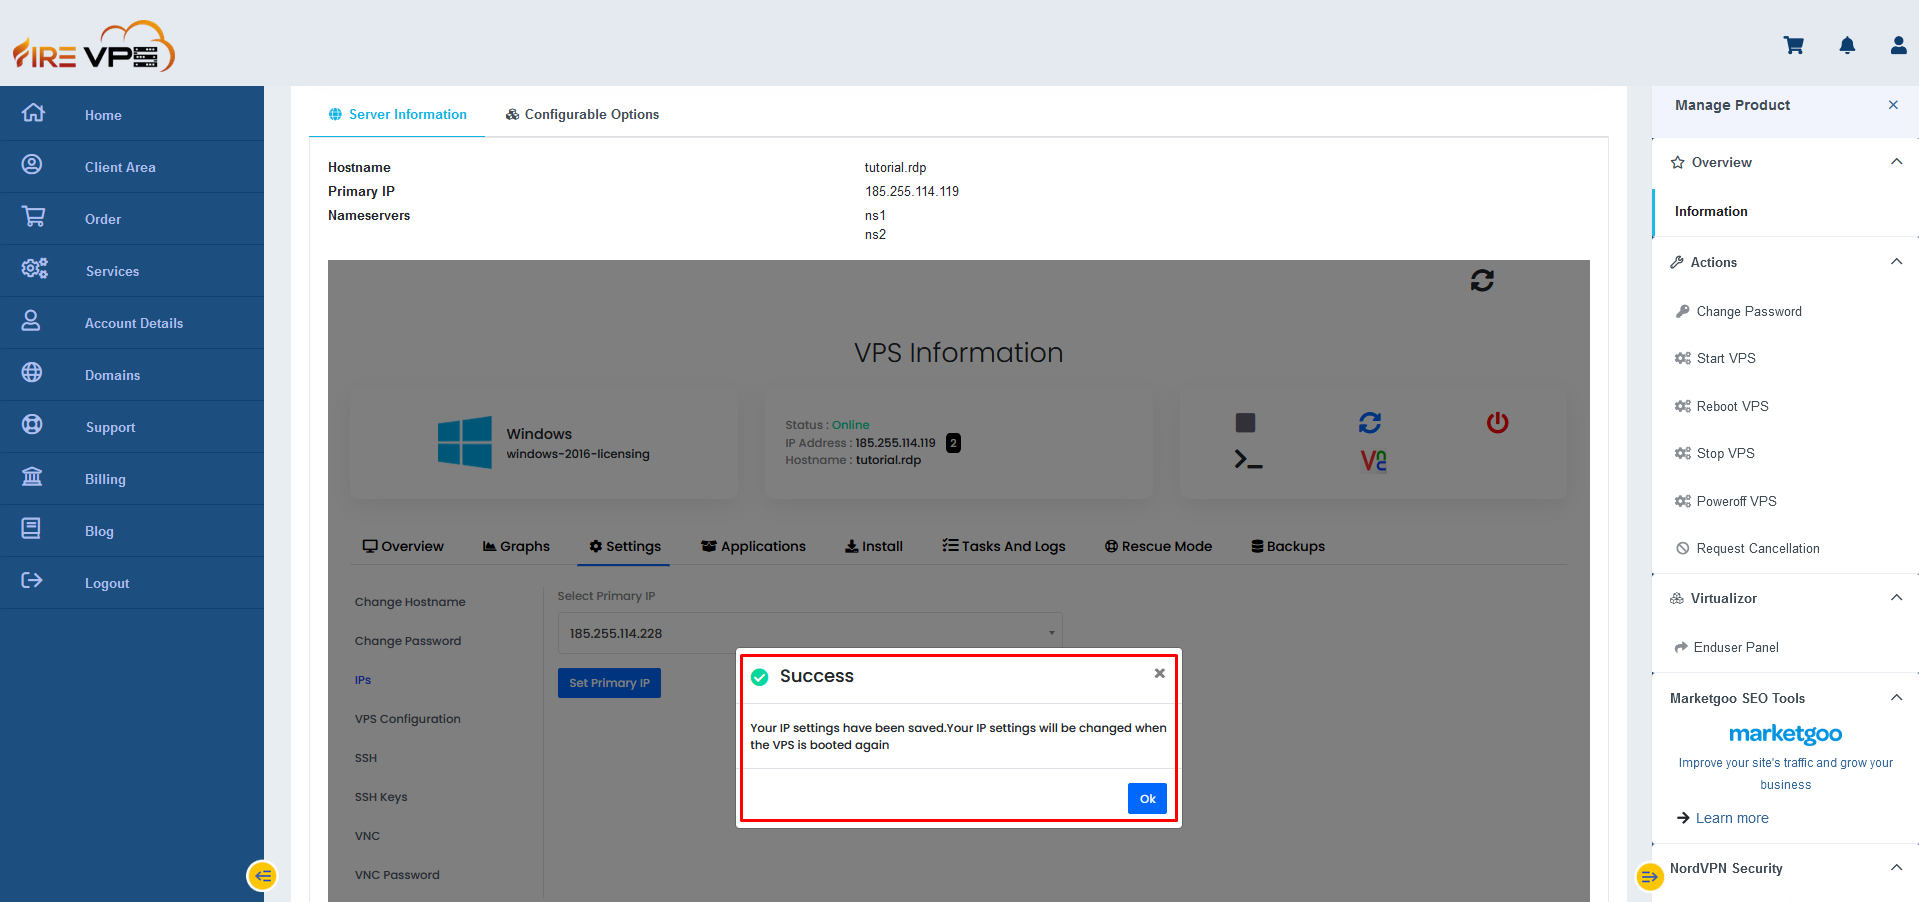
Now you need to stop and start the RDP/VPS to complete the IP change. Click on the “Stop VPS” option to turn off the RDP/VPS.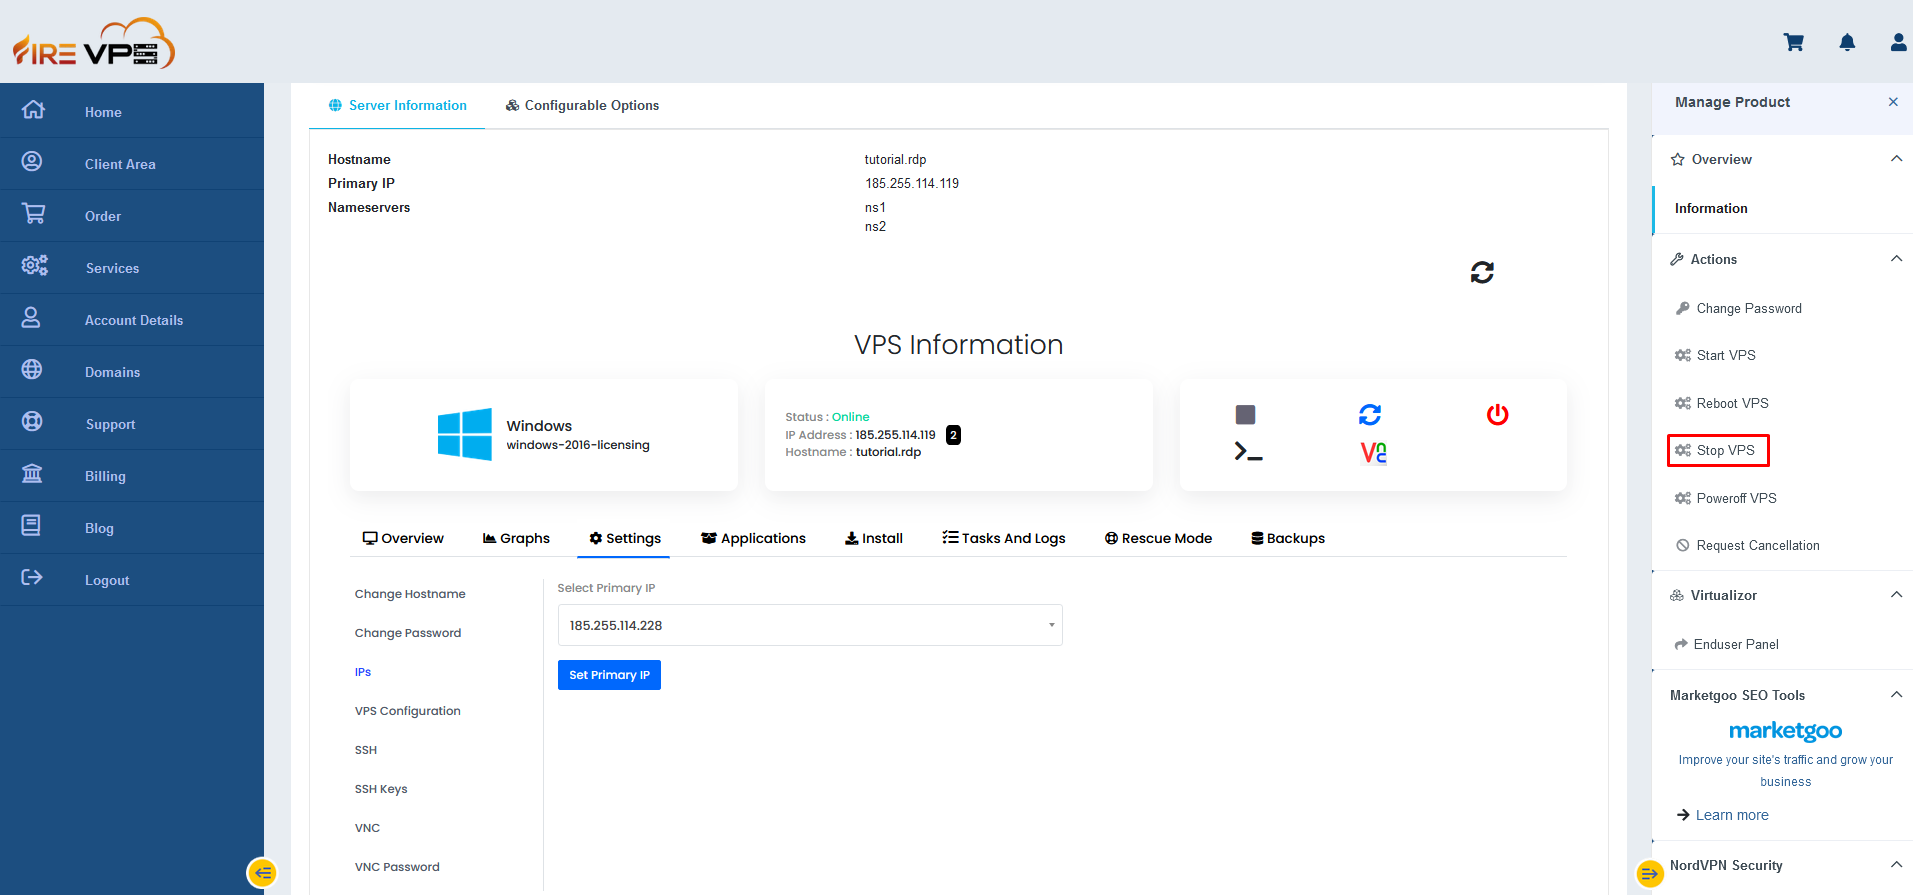
It will show Action Successful and the RDP/VPS will show offline.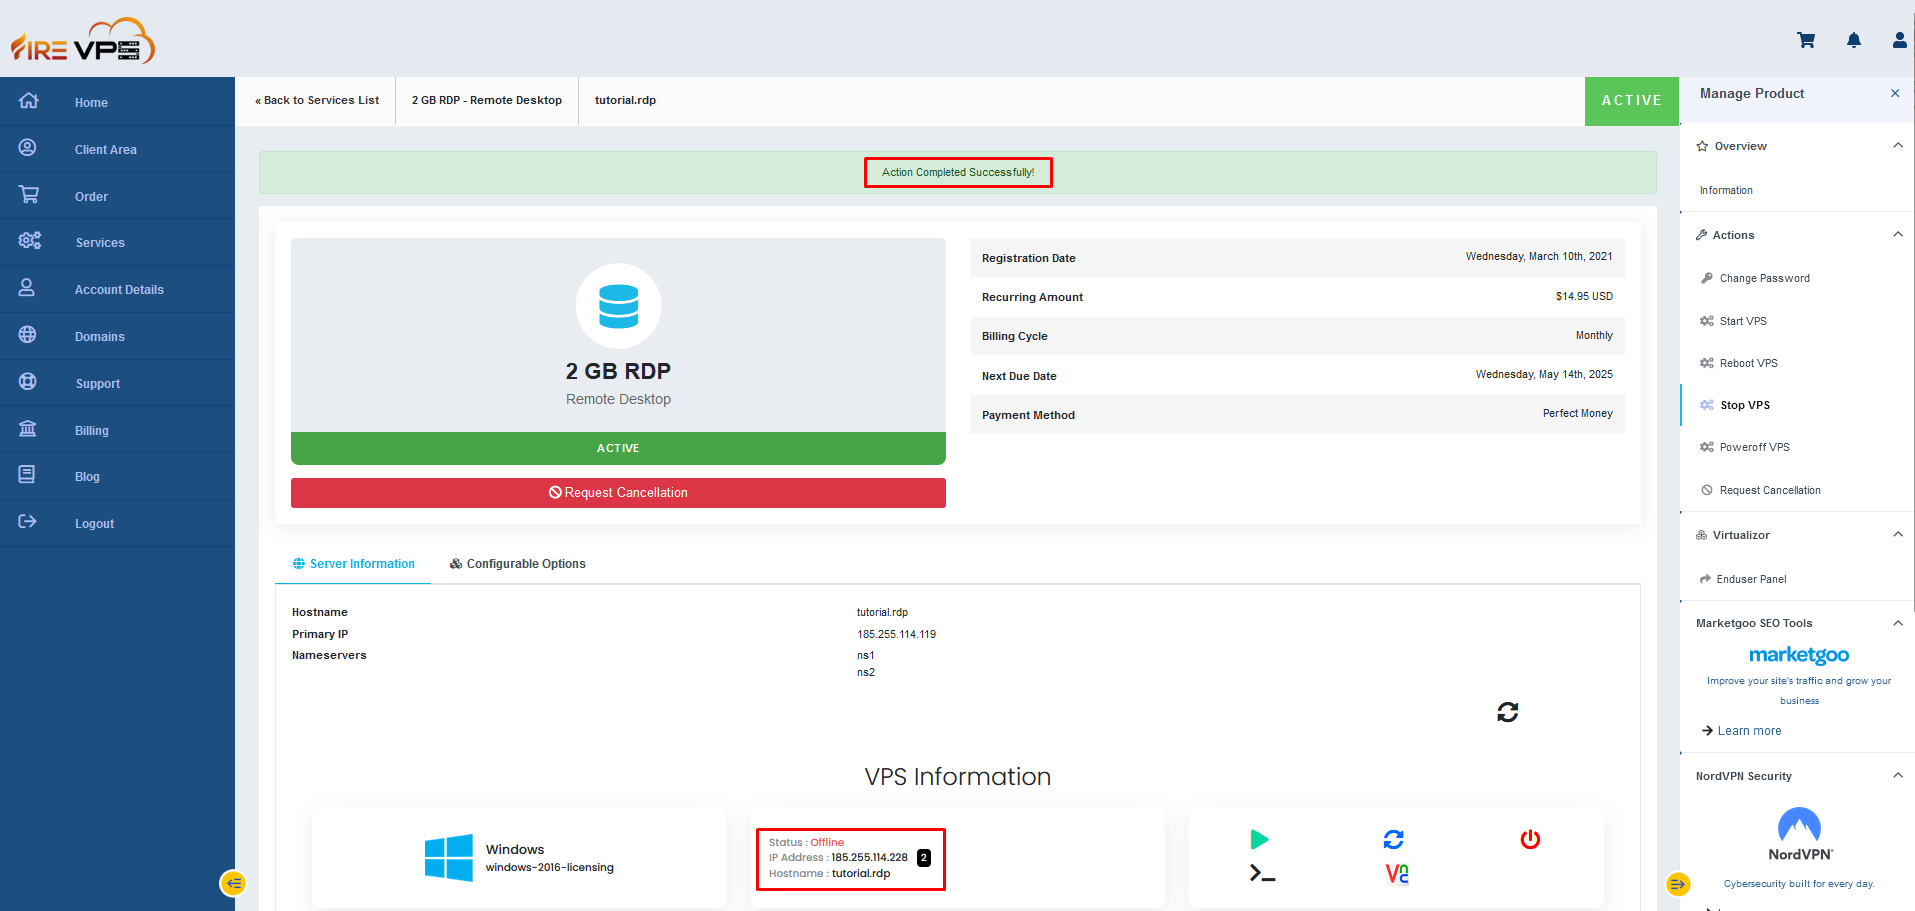
Now use the Start VPS option to turn on the RDP/VPS and complete the IP change.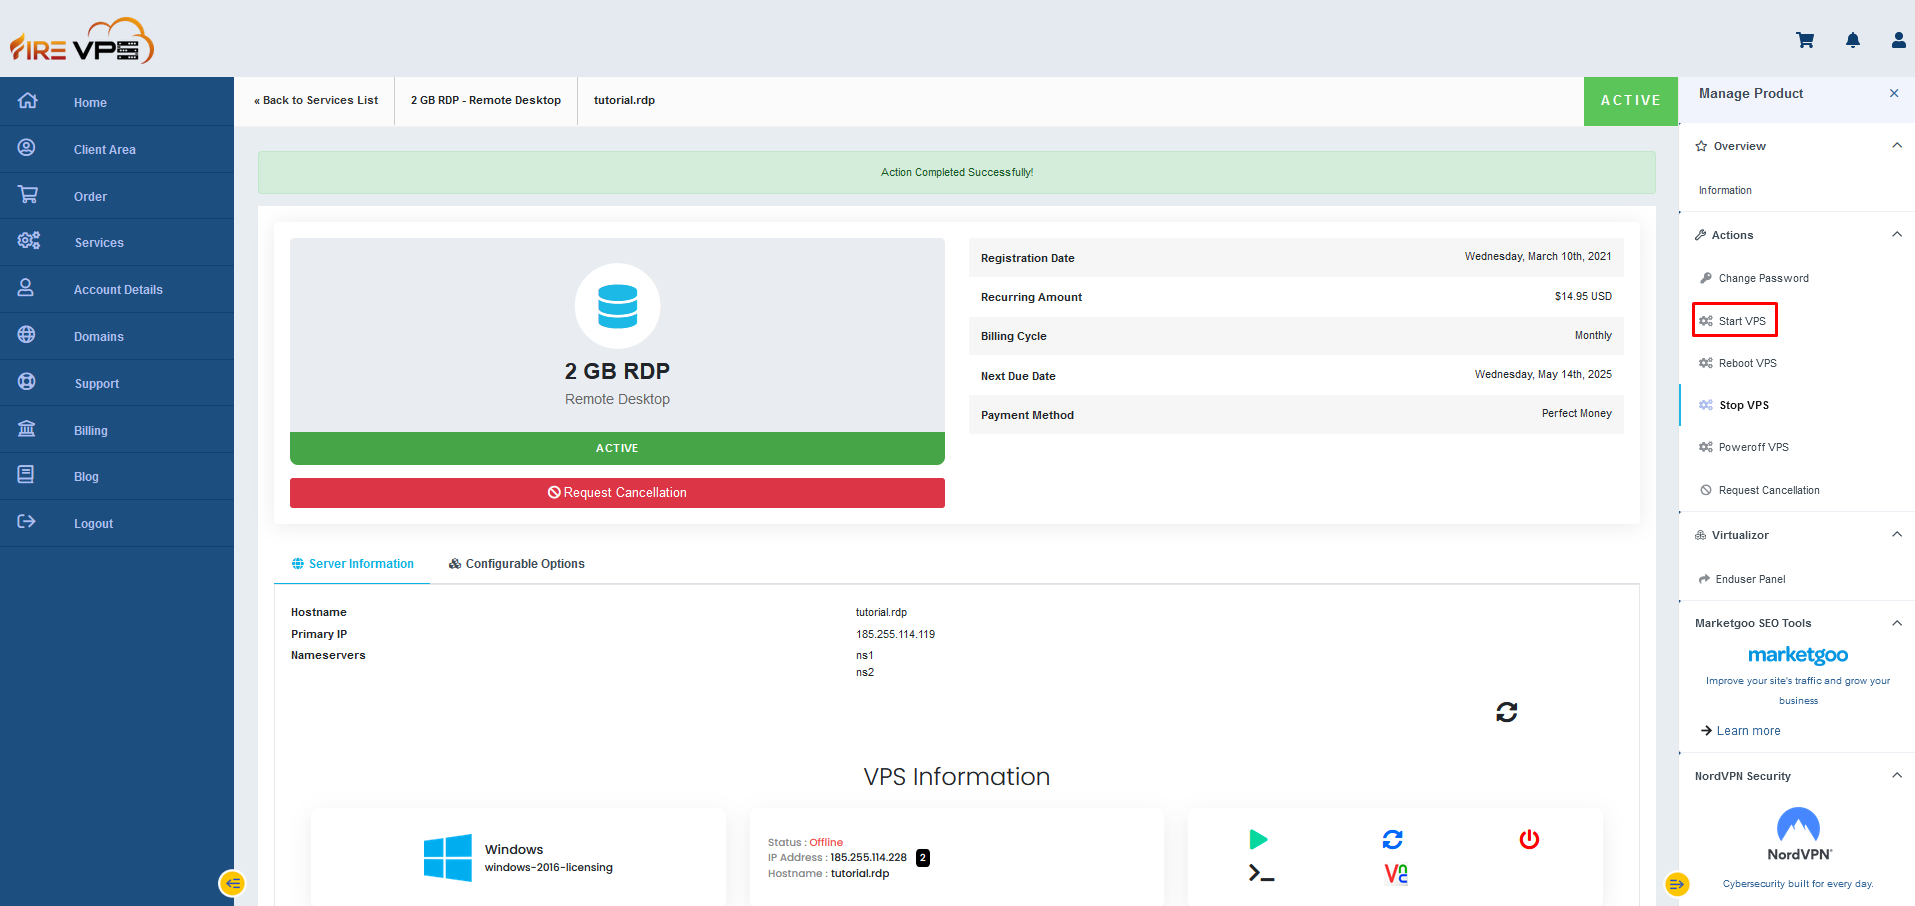
It will show Action Completed successfully again and the RDP will be online. The IP address has been changed too.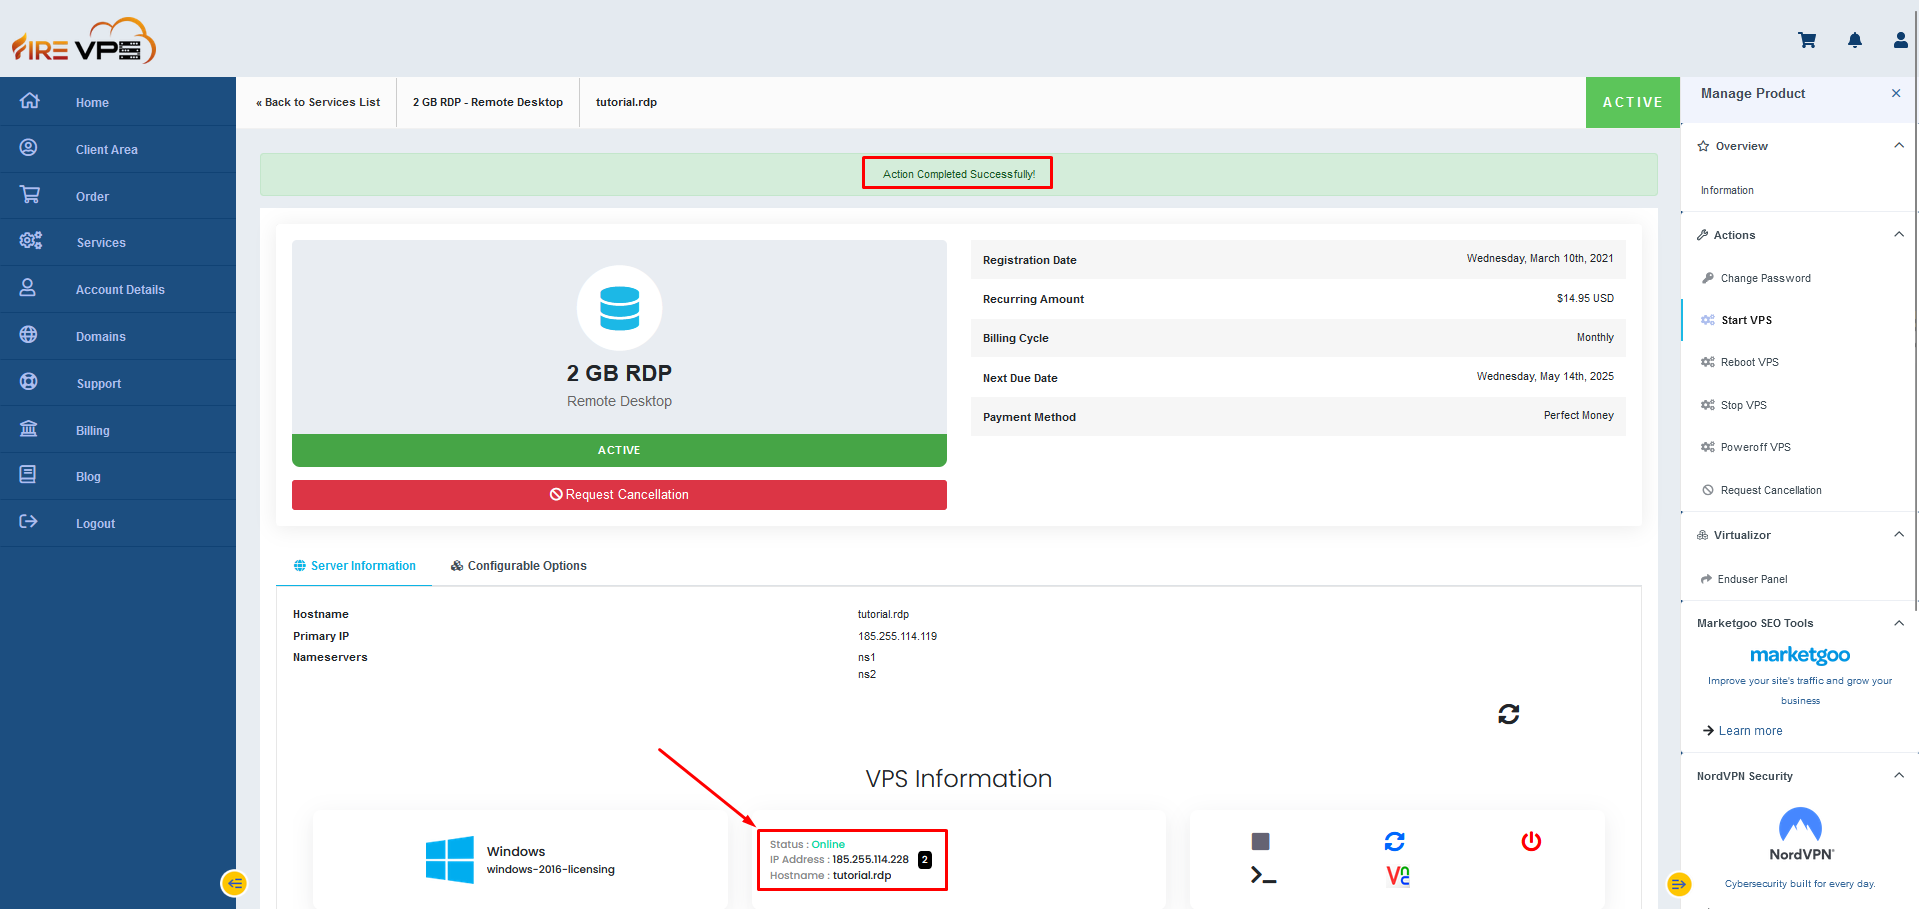
Now you can use the Newly changed IP address and your old login credentials to login to the same RDP.
This concludes how to change the IP address of a RDP/VPS from your Client area/panel if you have multiple IP addresses with your service.
If you are still having any issues or confusion, please feel free to knock us on Live Chat from our website. Our support team is always ready to help you.
Fire VPS / Live Chat / Skype / [email protected]

Need Domain Name?
85% Promo on Domain Names

Dedicated RDP
Poland RDP 50% recurring discount!
Recent Post
How to fix WordPress Media error “The uploaded file could not be moved to wp-content”
Symptoms: After moving a WordPress website from one server to another or any security changes in server level may trigger the error. While uploading a file using WordPress Media the upload process failed and the error is “The uploaded file could not be moved to...
How to Transfer Files to a Linux VPS using SSH?
While file transfer between windows systems is easy and straightforward, it is a little tricky when it comes to transferring files between a windows system and a Linux VPS. However, it can be done easily using SSH. In Windows, you can just copy/paste a file or folder...
How to Test Network Speed on Linux VPS
We usually check the internet speed to verify if the network is okay or if we are getting what we have paid for. For Windows, Android or other GUI (Graphical User Interface) based OS, it is pretty simple. You can just open a web browser and type “speed test”. Many...
How to Install Magento on Ryzen/Linux VPS – FireVPS
Installing Magento on a Ryzen-powered Linux VPS can significantly enhance your e-commerce platform's performance. Magento is a popular open-source e-commerce platform, and with FireVPS, you can leverage powerful Ryzen processors to ensure your online store runs...