How to add extra SSD to an existing RDP?
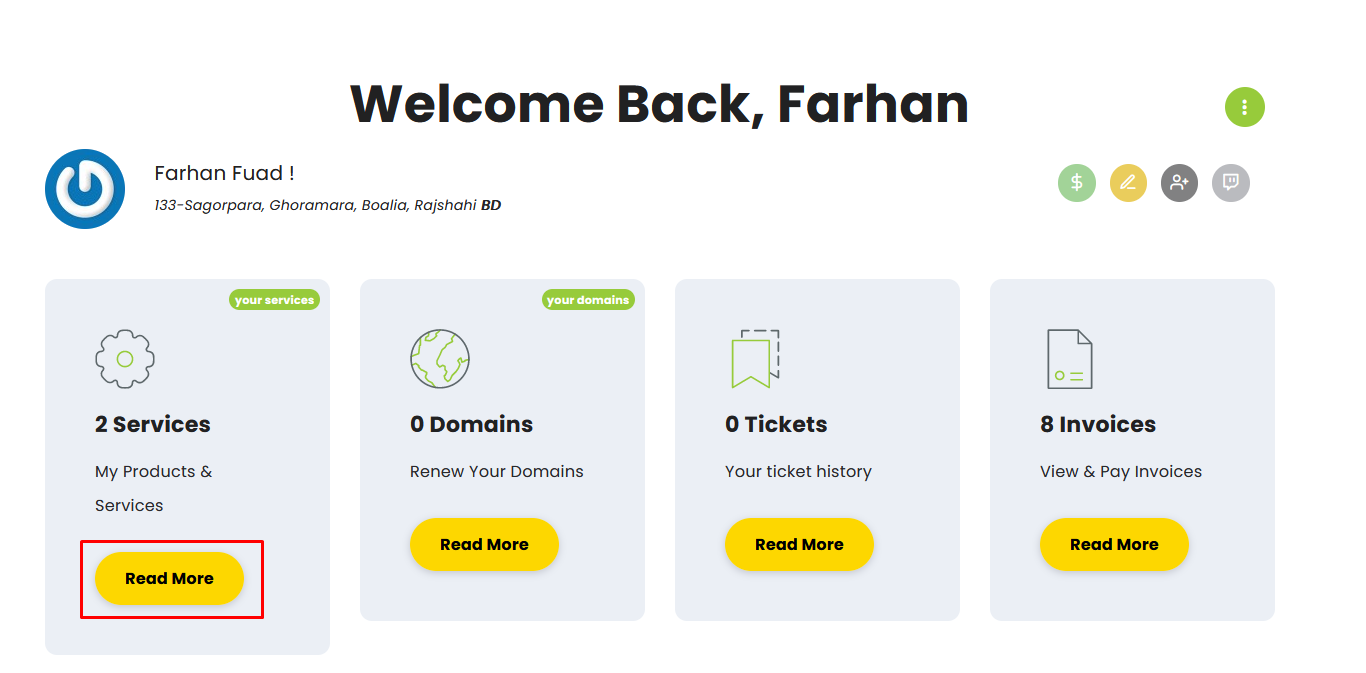
First login to your FireVPS client area
Go to “My Services” to check the available services.
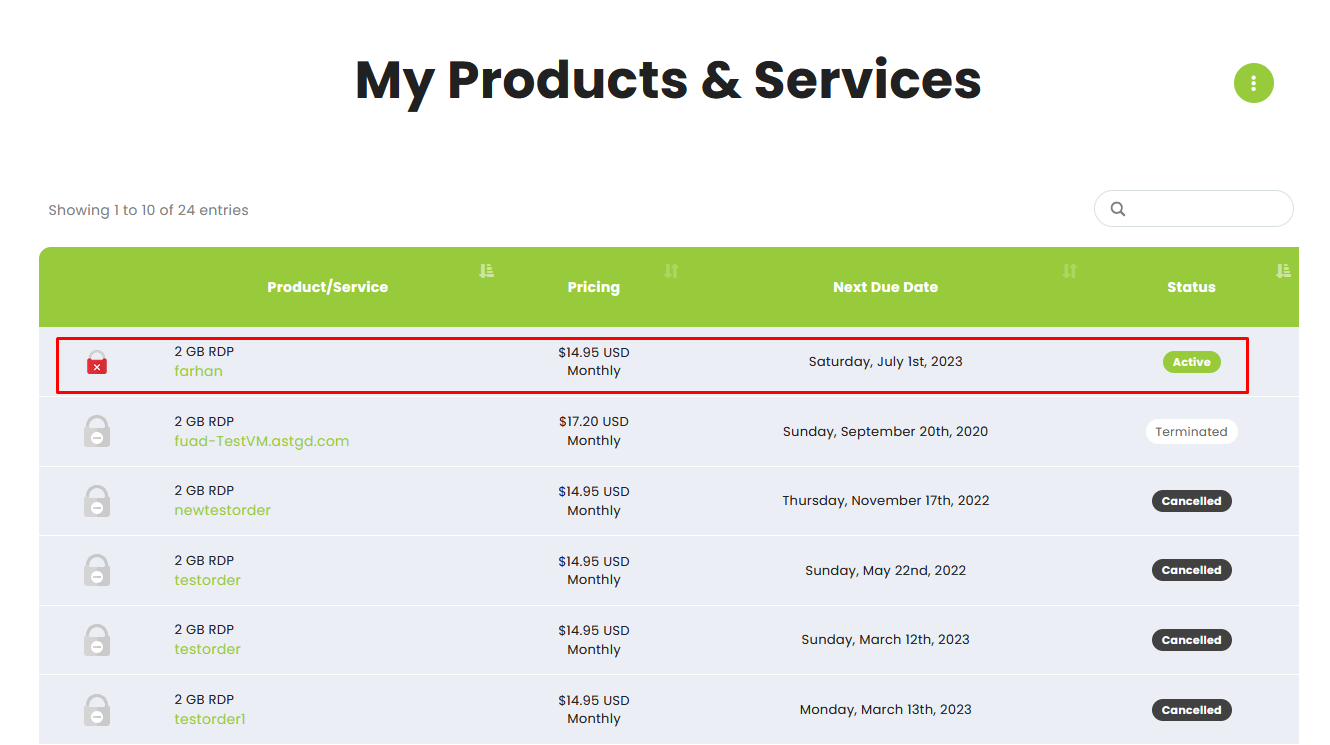
Then select the service to which you want to add the extra SSD.
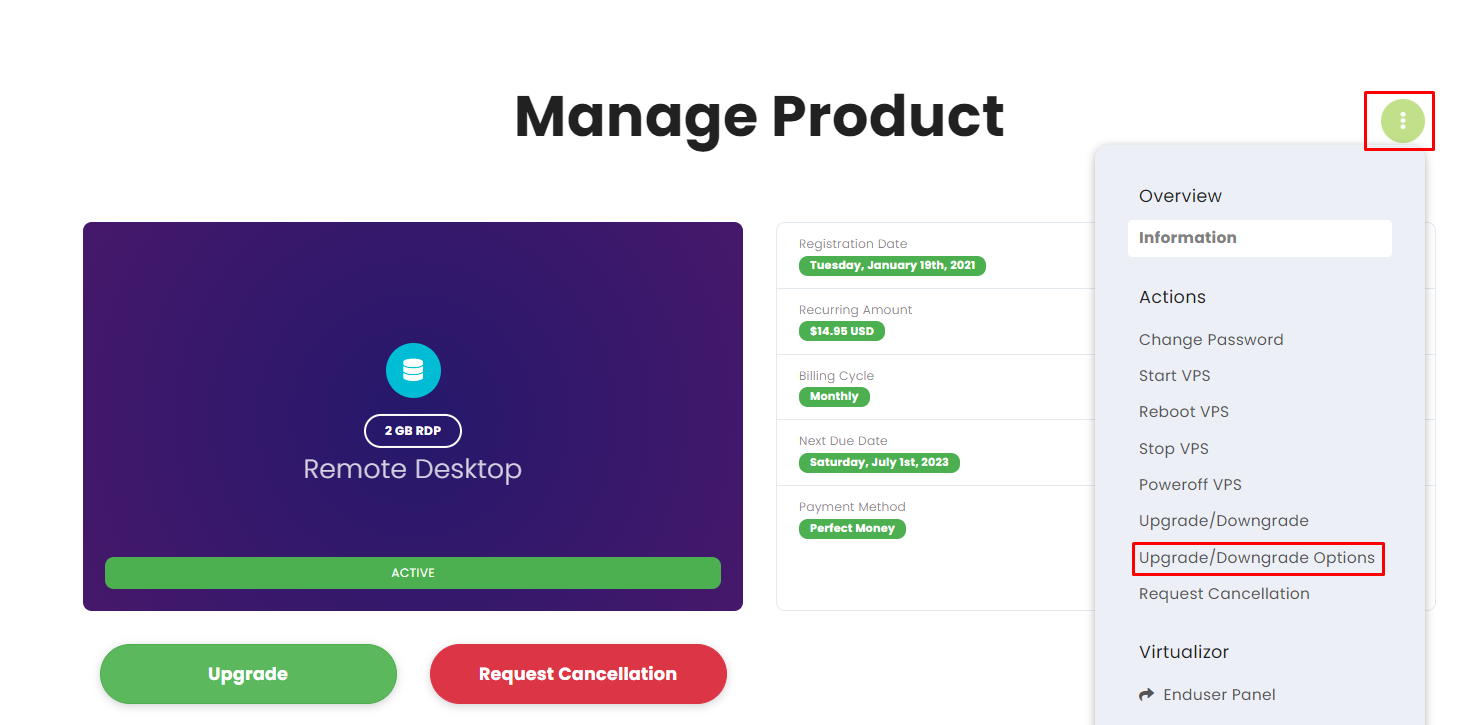
Click on the Upgrade/Downgrade options.
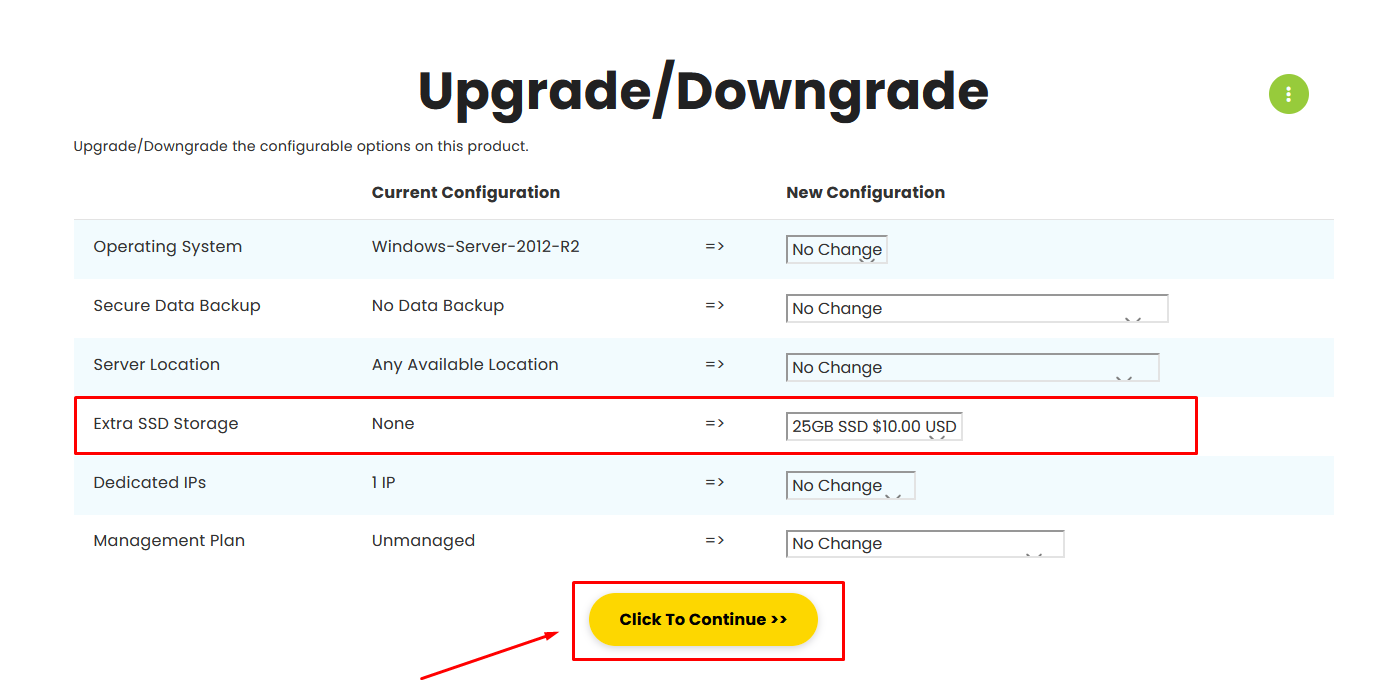
By default, you will see something like this on the upgrade/downgrade page.
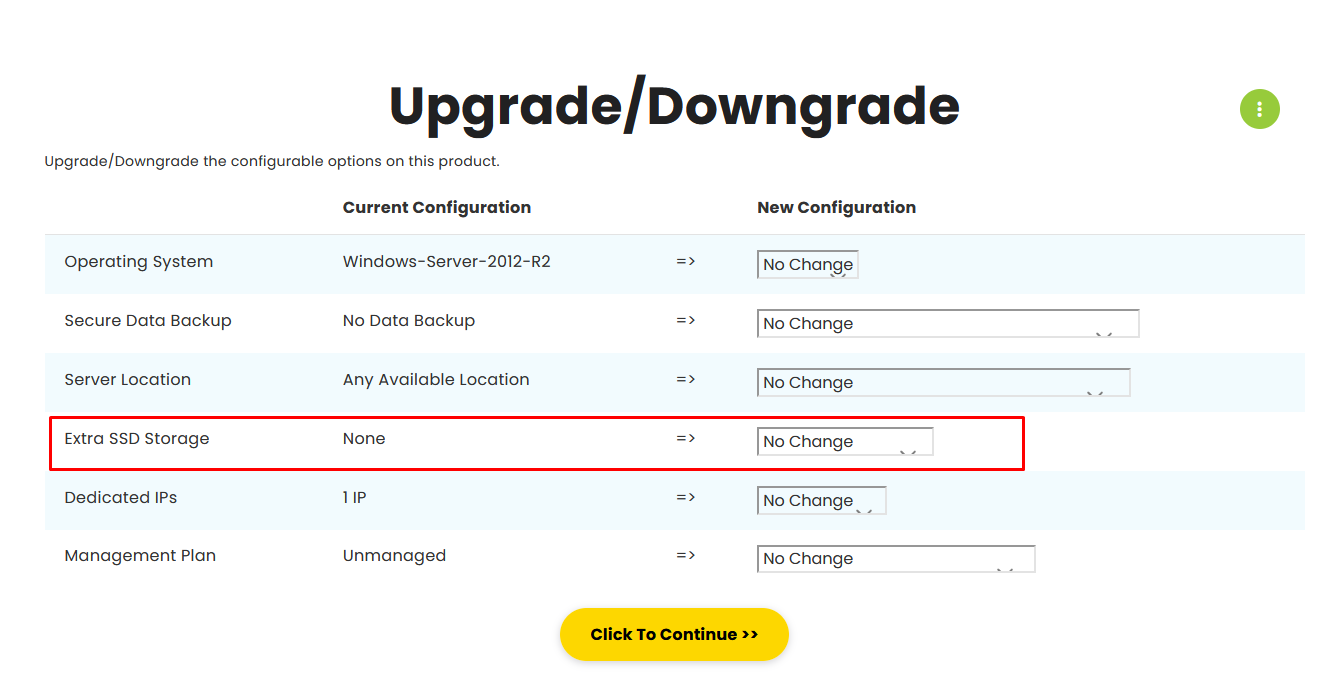
Now choose the extra SSD option according to your need and availability. Then click the “Click to Continue” option to proceed to the next step.
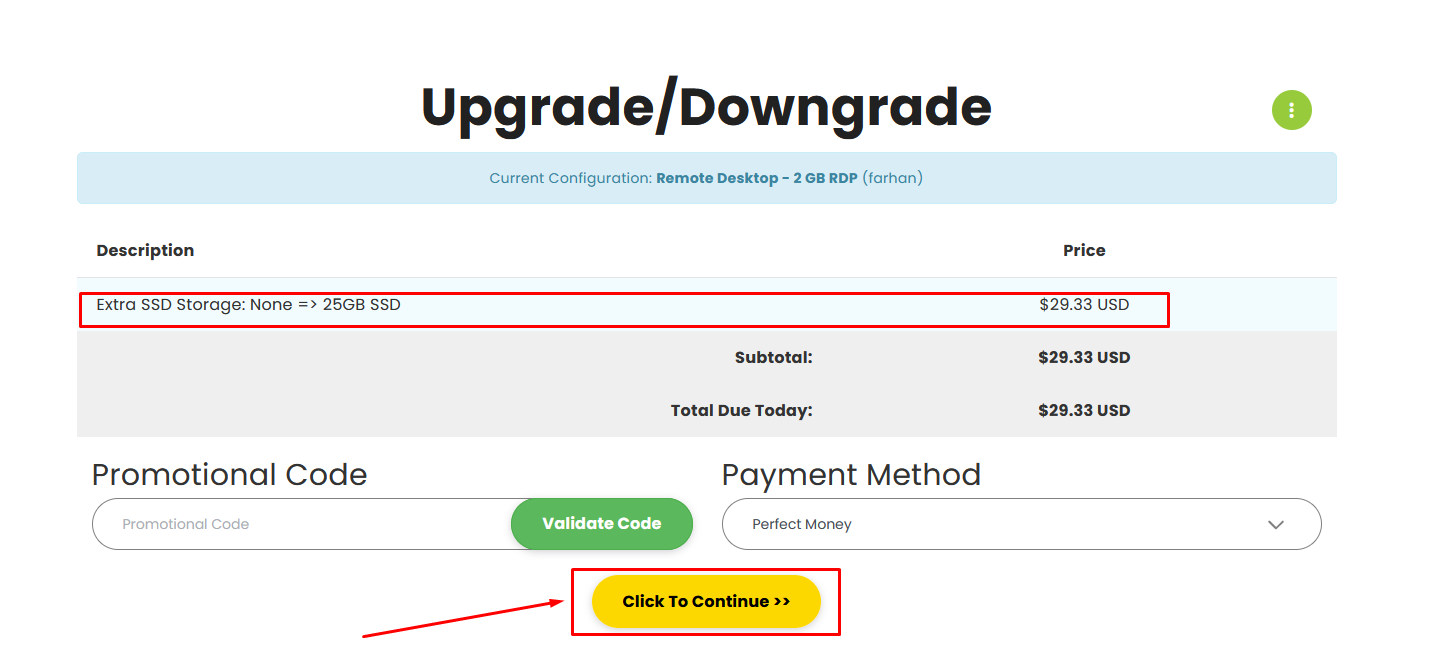
When you click the “Click to Continue” will take you to the next page and generate an invoice.
After you pay the invoice, we will do the needful to complete the UPGRADE.
- Please note that we need to “Restart” the RDP for completing all of the Upgrades and “Migration” is required for Upgrading to 10 Gbps plan from normal plans.
- Migration is also required when upgrading from lower plans like 2 GB or 4 GB to higher plans like 8 GB or 16 GB.
- Storage downgrade and downgrading from a higher plan to a lower plan is not possible.
- All payments are recurring.

Need Domain Name?
85% Promo on Domain Names

Dedicated RDP
Poland RDP 50% recurring discount!
Recent Post
Fixing “Read‑Only File System” Error on Linux System: Causes & Complete Solutions
fsck is designed to fix errors, not delete data. However, if it finds severely corrupted files, it may move them to a lost+found folder. Always back up if possible before running it.Some VPS platforms use shared virtual disks, which may be...
Command Not Found in Linux: Real Error Examples & How to Fix Them
It could be because the binary is not in your system's PATH. Run echo $PATH to see your current PATH, and ensure it includes the directory where the binary is installed.Functionally, it's the same issue — the shell can't locate the command....
bash: systemctl: command not found – How to Fix This Common Linux Error
If you’ve ever run into the error: bash: systemctl: command not found... while trying to manage a service in your Linux VPS or server, you’re not alone. This is one of the most commonly encountered Linux command-line errors, especially by...
Custom AI Models vs. Pre-Trained ChatGPT: What’s Best for Your Business?
In our day-to-day lives, we use AI models extensively—for research, email handling, knowledge sharing, content creation, and more. Among these, the most prominent leader in the AI market is ChatGPT, which has become an integral part of our...